Last updated
Is there something wrong with this page?
We are updating our documentation library to be ready for the Sector 10! Find out more in our Sector 10 roadmap or head straight to our collection of Sector 10 - Changes and Updates.
Installing Sector is as easy as installing Drupal. In this guide, we explain a couple of methods for creating a Sector site.
The two approaches we recommend are:
On your machine, make sure you have installed:
You also need to check that you meet the Drupal System requirements and if you want to know more about installing Drupal sites, see chapter 3 of the Drupal user guide
Get started with the DDEV docs and installation instructions
Using Lando? See the lando.dev/drupal/getting-started instructions
Composer has become the standard tool for installing Drupal 9 sites and is the only method supported by Sector maintainers. We recommend using Prestissimo for faster installations with Composer.
Steps to create a local Sector site with DDEV
composer create-project drupal/sector_project_template {project-name}
cd {project-name}
ddev config (this will start a config wizard)
You can keep the default values in this ddev config step - feel free to change the project name, but leave the docroot as 'web' and the project type as 'drupal9'.
ddev start
By default, DDEV uses common ports, so you'll likely get the following error:
Failed to start {project-name}: Unable to listen on required ports, port 80 is already in use.
Open the .ddev/config.yaml file, then change the ports listed in router_http_port and router_https_port.
Run ddev start again.

Installing Sector with DDEV
Once the project has started, DDEV will give you a link - visit this link and select your language.
Sector will begin installing automatically, and after you've completed the installation wizard you will have a fresh Sector site.
You can use this method to set up the production version of your site, or a version to share with others. Since this method doesn't use a tool to automate the installation (like DDEV in the previous method), everything needs to be done manually.
Steps to create a manual Sector site on a remote server
For guidance, see Drupal's guide for creating a database using many of the popular database engines.
You'll need to create a host file on your server which points at the site directory. This is very specific to the web server you're running.
Below, you can see an example host file for Apache 2 web servers (slightly modified from the example on Drupal's multisite documentation).
<VirtualHost *:80>
ServerAdmin me@domain.com
DocumentRoot /var/www/{project-name}/web
ServerName site1.d8multisite.com
<Directory />
Options FollowSymLinks
AllowOverride None
</Directory>
<Directory /var/www/{project-name}/web>
Options Indexes FollowSymLinks MultiViews
AllowOverride All
Order allow,deny
Allow from all
</Directory>
ErrorLog ${APACHE_LOG_DIR}/{project-name}_error.log
LogLevel warn
CustomLog ${APACHE_LOG_DIR}/{project-name}_error.log combined
</VirtualHost>
Now that you've created the host file, enable the site and restart the web server.
Again, this is specific to your environment - for example, for Apache 2 you can run sudo a2ensite {vhost} && sudo service apache2 reload
Visit the site to finish the setup - select your language, and on the 'Set up database' screen, enter the database details you created earlier.
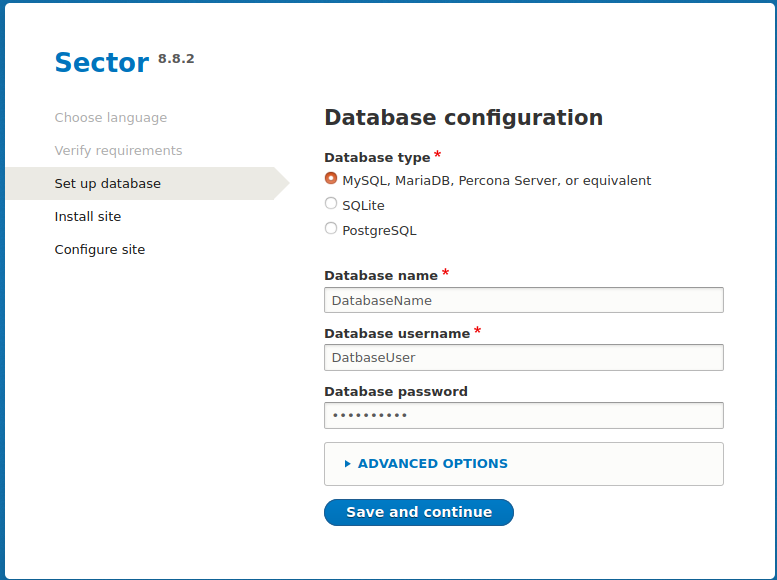
Database configuration for your Sector site.
Sector will begin installing automatically, and after you've completed the installation wizard you will have a fresh Sector site.